This dish is one of the reasons my husband and I rarely eat at Italian restaurants: we like this pasta better than much of what we might order. I started making it on a whim because I wanted more iron in my diet, and clams are an excellent source. Give yourself a good 45 minutes to prepare this dish so the sauce has time to simmer, which will allow the flavors to develop more fully. This recipe makes enough for two people eating full plates, so add a salad and bread or double the recipe if serving more.
You Will Need:
- Olive oil
- Garlic (1-2 cloves)
- Shallot (1 large bulb or 2 small ones)*
- Butter
- Salt
- 10-oz. Can boiled baby clams
- [Optional] White cooking wine (we live in a dry county, so I wasn’t able to use any wine, but you should if you are able to get it)
- Lemon juice from 1/2 lemon
- Frozen peas (roughly 3/4 cup, use more or less depending on your appetite for peas)
- Cream (roughly 1/2 or 3/4 cup, see step 5)
- Linguine (we use about 1/2 package per can of clams, which is plenty for two people)
* Shallots are members of the onion family. They look smaller than normal onions and have a more delicate flavor. They are also harder to find and more expensive, so use a finely-chopped yellow onion if you need an alternative.
Two free burners on your stove (one should be large)
Large saucepan (if you don’t own a designated saucepan, select a wide pan with sides that are perpendicular to the base, such as a stock pot)
Knife/cutting board
Wooden spoon
Can opener
Fine-mesh strainer for rinsing clams
[Optional] Citrus juicerLarge pot for cooking pasta
Strainer for draining pasta, or spider/tongs for removing noodles from water
[Optional] Tongs for transferring pasta from pan to plates (if elegance is one of your objectives)
Steps
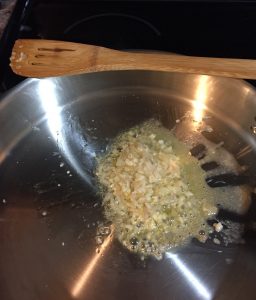
1. Pre-heat some olive oil (one good glug) in a large saucepan over medium heat.
2. Finely chop one garlic and shallot. Add to the pan with the olive oil along with a pat of butter and a pinch of salt. Don’t worry if the vegetables don’t sizzle right away. You are infusing the oil with their flavor as the pan heats up. Stir occasionally to keep the garlic from burning, but don’t worry if it browns.
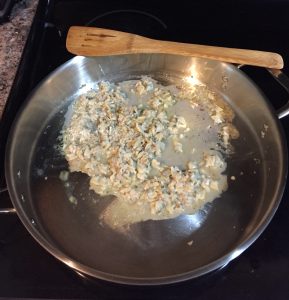
3. Drain and rinse the clams. Be sure you pick through them to find and remove any bits of shell.
3. Once the shallots are translucent and starting to brown, add the clams along with a good squeeze of fresh lemon juice and a splash of white cooking wine. Stir.
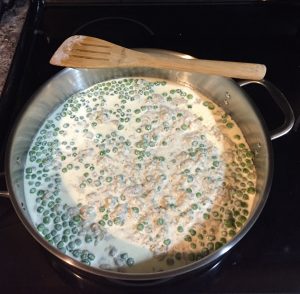
4. Once the wine has evaporated, turn the heat to low. Let everything sit for a few minutes at this temperature. You want to get to where the pan is warm but not scalding, because you’re about to add cream to the mix and you don’t want it to immediately curdle.
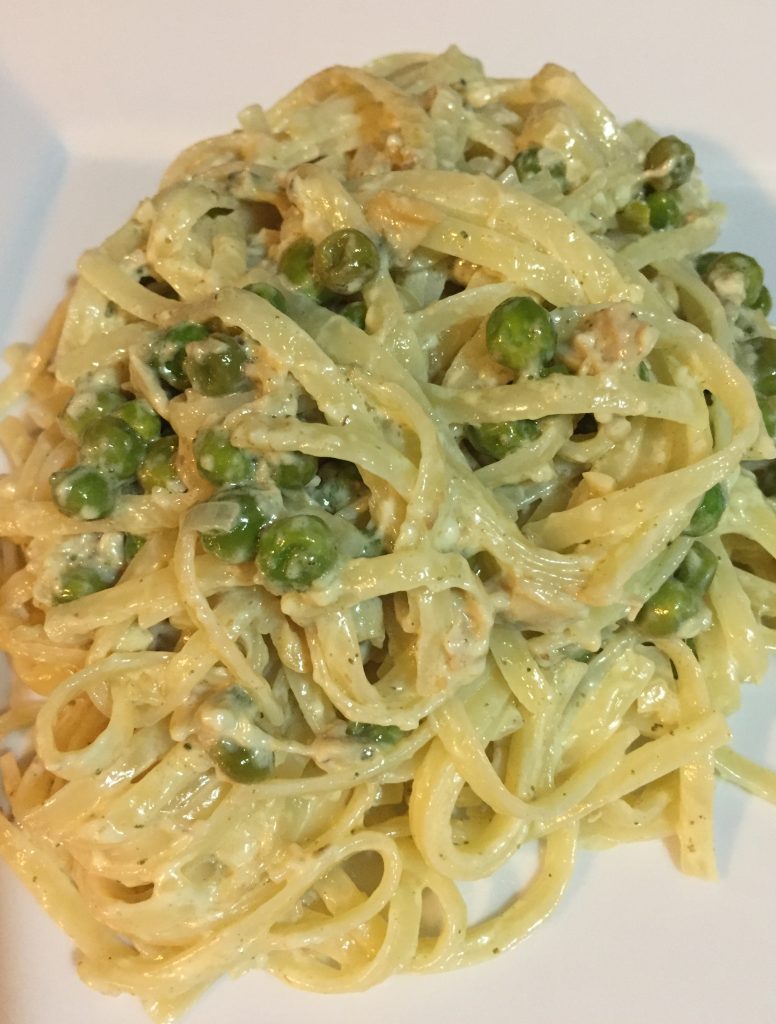
5. Add the frozen peas and pour the cream over the peas until there is enough cream to cover the bottom of the pan. Break up any lumps of peas and distribute them around the pan; they will keep the cream from breaking. Let everything simmer at a low temperature until the peas are no longer frozen.
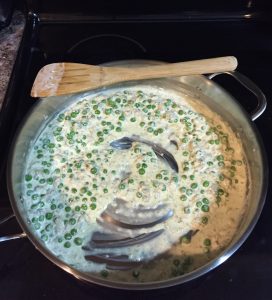
6. Once the peas are still cold but no longer frozen, increase the temperature to halfway between low and medium. Stir, wait a few minutes, and move to step 7.
7. Fill a large pot with salted water and bring the water just below a boil. Do not add the pasta yet.
8. Once the sauce has begun to thicken, taste it. Add extra wine, lemon juice, butter, or salt if the flavors need to be stronger, but remember that flavors will intensify as the sauce continues to reduce. Extra lemon can cause the cream to curdle, so add it little by little if you think your sauce lacks acid.
9. Once you like the taste of the sauce, kick your pasta water to a boil, add the linguine, and cook according to the package directions, breaking it in half if you don’t like chasing long noodles around your plate. (For tips on cooking pasta, see this post.) It’s ideal if you begin cooking the noodles once you like the taste of your sauce but want it just a bit thicker.
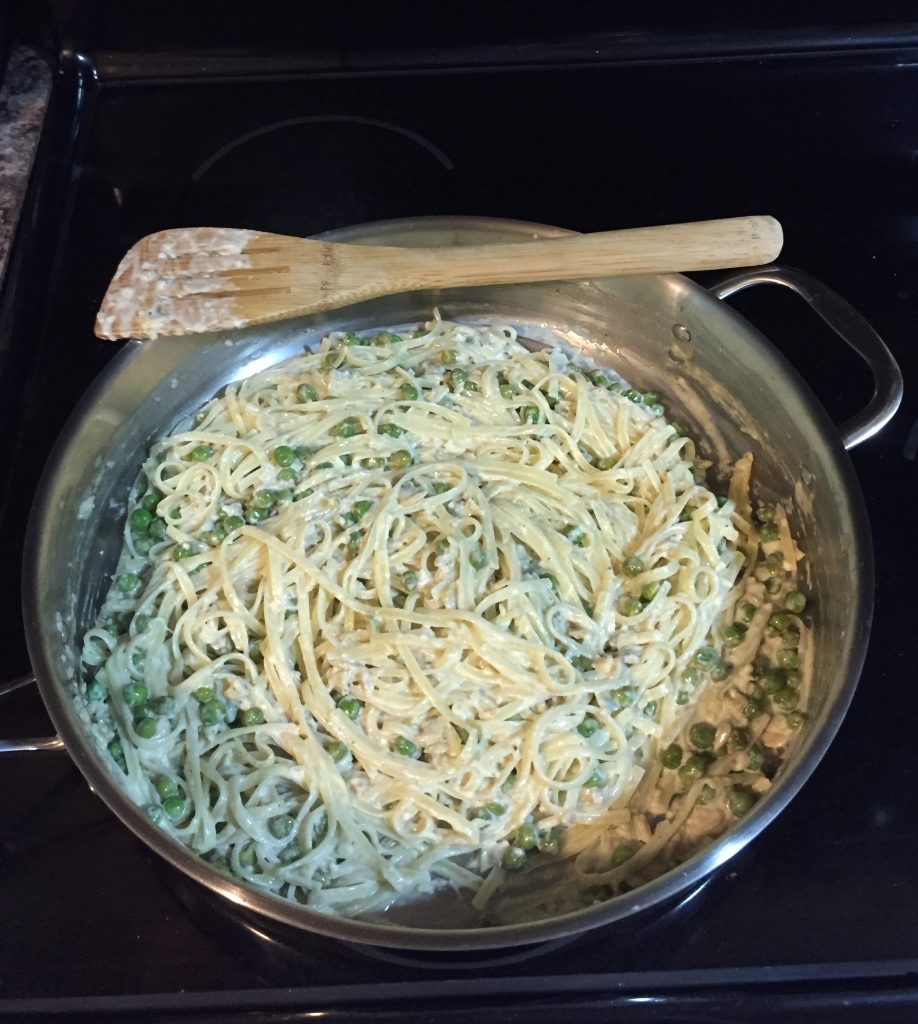
10. When the linguine is al dente, remove it from the pan and transfer to the pan with the sauce. Stir everything together to coat the noodles and reduce the heat to low.
11. [Optional] If the sauce seems runny once you add the noodles, allow everything to sit in the pan for a few minutes before serving. This time allows extra moisture to evaporate and gives the dish time to come together. Otherwise, serve immediately, with a nice slice of crusty bread if you have it.